Installing PHP on Amazon Linux 2023 doesn’t require adding any third-party repository, it is already available through the default system repository of AL2023. Well, PHP is quite important for developers and users who are deploying some web applications developed in this server-side scripting language. So, let’s see the quick steps and commands involved in the installation of PHP on the Amazon Linux 2023 server.
Step 1: Connect to the AL2023 Instance
Go to your EC2 Dashboard, select the instance, and click on the “Connect” button, or use your local terminal and connect the Instance via SSH using the private key. If you are about to use the local terminal then the command to use SSH and connect to the server will be:
Just replace the key.pem with your actual key file and amazonlinux-user@your-instance-ip with your instance’s user and IP address:
ssh -i path-to-key.pem amazonlinux-user@your-instance-ipStep 2: Update Your System
Once you have the access to Amazon Linux terminal, execute the system update command, in case there are some updates available, they will be installed to provide overall system stability including rebuilding of DNF package list cache.
sudo dnf update -yStep 3: Installing PHP on Amazon Linux 2023
Let’s first check what are versions available for PHP to install through the default system repository of AL2023. For that, we can use:
sudo dnf search PHP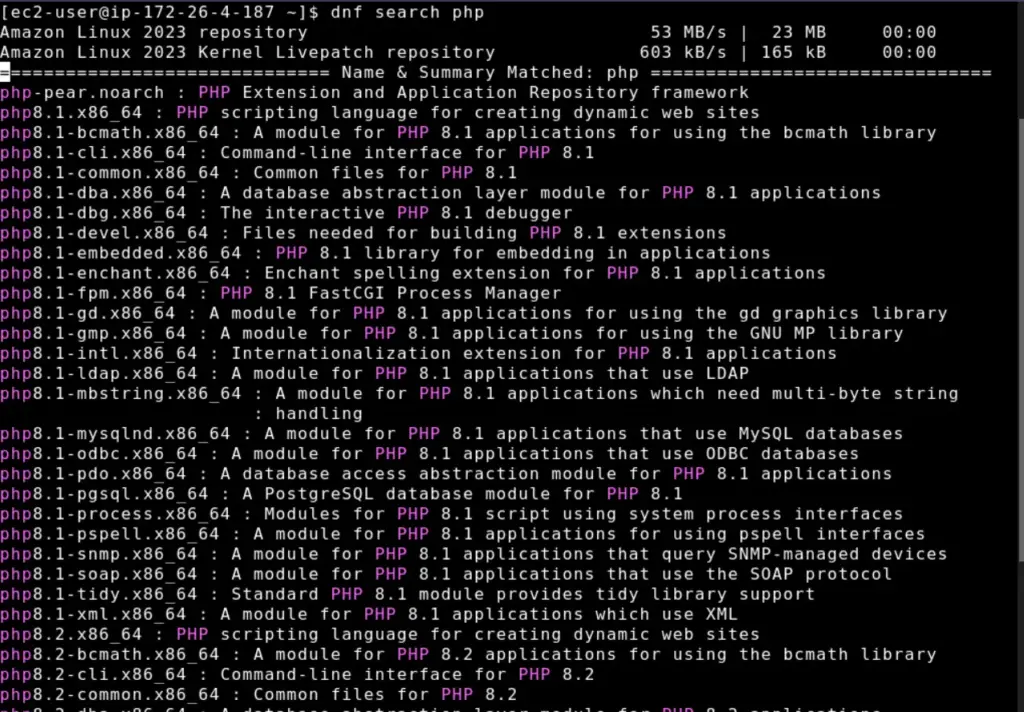
You will see a couple of versions, the latest one will be installed using the given command along with commonly used modules, in our case it was PHP 8.2.
sudo dnf install php php-cli php-mysqlnd php-mbstring php-xml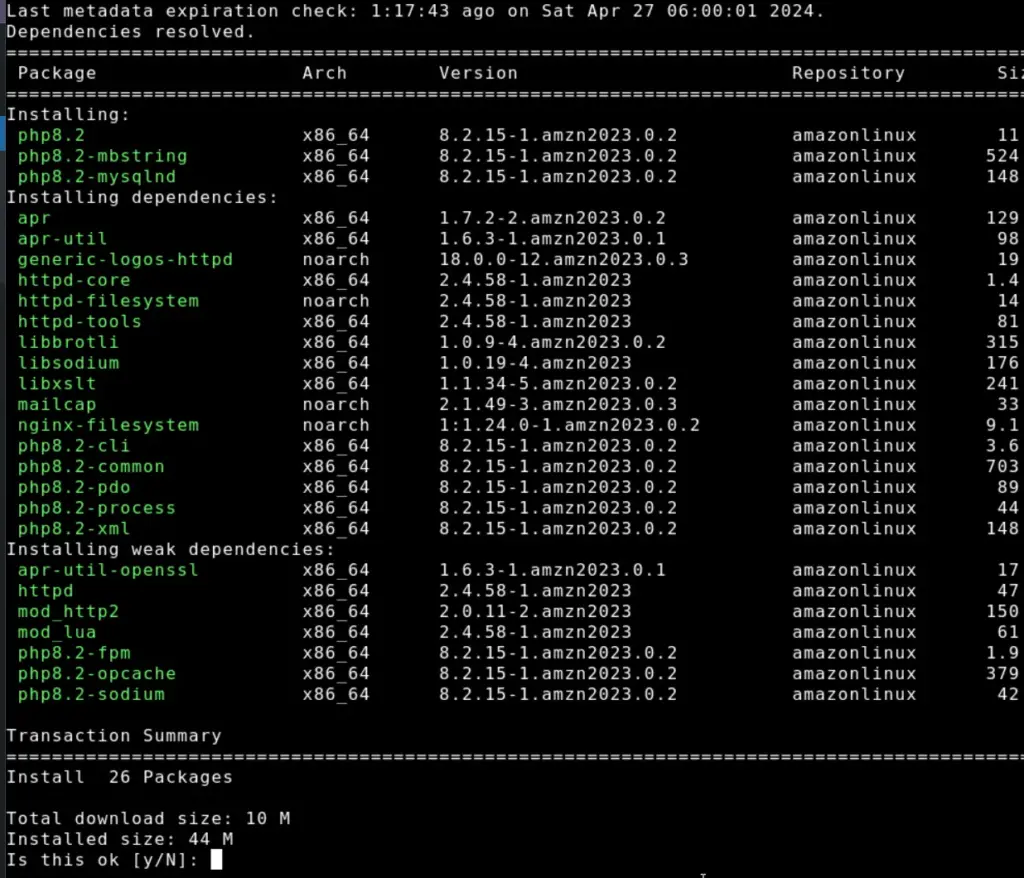
Note: If you want to install a specific version, for example, PHP 8.1 then in the command mention the version as given below.
sudo dnf install php8.1 php8.1-cli php8.1-mysqlnd php8.1-mbstring php8.1-xml
Step 4: Verify PHP Installation
As we have completed the installation, we can check the PHP version, PHP which will also confirm its availability on our Amazon Linux. The given command will only provide the version details along with some other information.
php -version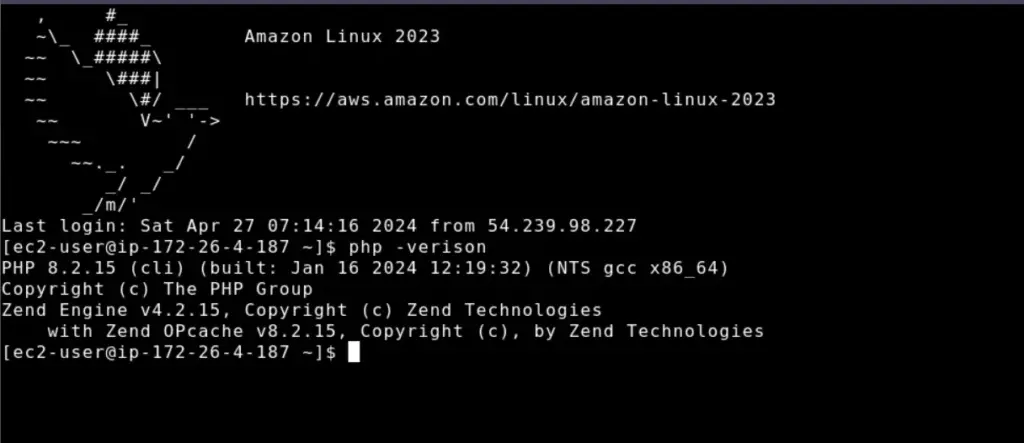
Step 5: Configure PHP (Optional)
Suppose there are specific requirements of some web applications from PHP like the PHP memory limit, waiting time to execute the process, time zone configuration, and more. In that case, we can use the PHP configuration files which are usually located in /etc/php.ini and /etc/php.d/. Using Nano, we can edit them, for example:
sudo nano /etc/php.iniStep 6: PHPinfo test page
To go one step further and check what are modules enabled in PHP and other functions graphically, we can create a test file, generally known as phpinfo. In this file, we will add a simple PHP script and save it in our web server’s document root directory. Therefore ensure that you have either APACHE web server installed on Amazon Linux 2023 or any other you want to use.
Navigate to the Web root directory:
cd /var/www/html/Create the phpinfo File
sudo nano info.phpAdd the following PHP Code
<?PHP
phpinfo();
?>
Save the file by pressing Ctrl+O and hitting the Enter key, to exit the editor use – Ctrl+X.
To access the test PHP file, open your web browser, and in the URL box type – http://your-public-ipaddress/info.php.
Replace “your-public-IP address” with the IP address or domain name used to access the Amazon Linux 2023.
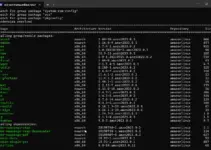
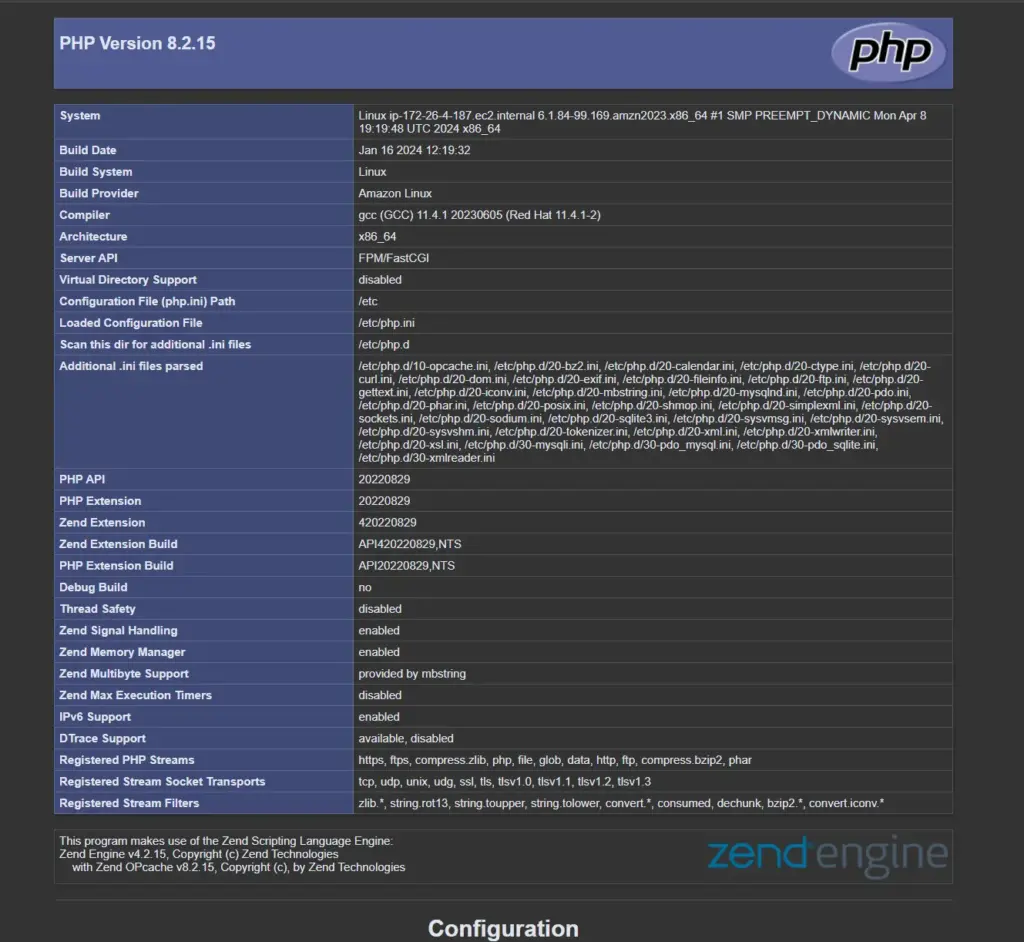
The PHP page with complete details of modules and other configurations will appear, which will be easy to understand as compared to the command line. For example, here is the screenshot:
Conclusion
The installation method we have shown here in this guide will not only let users install the PHP on Amazon Linux 2023 server but even on other RHEL-based Linux systems such as AlmaLinux, Rocky, Oracle Linux, and others…