Ubuntu 19.10 ‘Eoan Ermine’ has been announced officially and available to download for Desktop, Laptops, and servers. Here we will see, how to download its latest ISO image to install on VirtualBox VirtualMachine.
The current latest version of the Ubuntu that 18.10 is ready for download and comes with lots of additions. Now it has laced with Kernel 5.3 along with support for AMD’s Navi GPUs, new ARM SoCs and Intel’s Speed Select on Xeon servers.
Running Gnome 3.34, Ubuntu 19.10 has got wireless LAN configuration improvements to low the latency rate in X.org sessions, support for WPA3 and furthermore, the X-Wayland apps can now run under root privileges. DLNA sharing is enabled by default, so it becomes now easy to share multimedia content resides on Ubuntu with other smart devices.
Also, to ease the installation of famous Chromium browser, it has been included in SNAP store, now. Means no need to download setup and run commands. Just snap it. Here is the tutorial on that.
Moreover, ZFS file system support will be there which makes it easy to create snapshot backups. Those are using an Nvidia graphics card with their Ubuntu system, now they will get its drives in the Ubuntu 19.10 ISO, integrated into the boot process.
As we know that Ubuntu is not limited to Desktop only, rather clouds and servers too, thus, the developers also have done some improvements in these areas. They have introduced a virtual 3D GPU which can be created in Qemu’s Virtual machines in Qemu, however, we can’t compare its performance with the passthrough of physical GPU to Virtual machines, nevertheless, it will help the systems to some extent where the passthrough is not available.
By Default, PHP 7.3 will be available in Ubuntu 19.10 and will receive security patches until December 6, 2021, plus new versions of Dpdk, Open vSwitch and OpenStack.
Besides, the availability of Libvirt 5.6 now makes migrations of VMs faster through parallel connections and add-on for Kubeflow that adds Microk8s for Artifical intelligence and deep machine learning capabilities by linking the container clusters with TensorFlow among others.
Ubuntu 19.10 apart from a standard desktop Gnome just like always available in KDE, LXDE, Mate, Xfce, Kylin and Budgie Desktop environments as well. Being not a long term version it receives support until July 2020. The learning and improvements of this version become a foundation stone for the next long term version i.e Ubuntu 20.04 LTS which will be released in April of 2020. To know more about you can see the official Ubuntu release note.
However, come to the point of this tutorial which is to know how to download the Ubuntu 19.10 ISO image file to install it over VirtualBox.
Step 1: Download Ubuntu 19.10 ISO Image
As we know, it is not a Sisyphean task to get the Ubuntu latest Linux operating system ISO image. What we have to do, just go the official download page of the Ubuntu. For your convenience links are given below for each edition of Ubuntu 19.10.
Here are the links to download:
- Ubuntu Desktop and Server- AMD64 ( Recommend: Use this for standard Ubuntu OS)
- Raspberry Pi
- Ubuntu Cloud Images
- Ubuntu Netboot
- Kubuntu
- Lubuntu
- Ubuntu Budgie
- Ubuntu Kylin
- Ubuntu MATE
- Ubuntu Studio
- Xubuntu
The system requirements for Ubuntu 19.10 are
- 2 GHz dual-core processor or better
- 4 GB RAM
- 25 GB of free hard drive space
- Bootable Ubuntu ISO DVD drive or a USB
Step 2: Get the VirtualBox
If you already have VirtualBox on your Windows or Ubuntu system then simply move to the next step, or just go to the www.virtualbox.org and download one as per your host operating system. Know more about VirtualBox installation.
Step 3: Create Virtual Machine on VirtualBox
- Run VirtualBox.
- Click on New button.
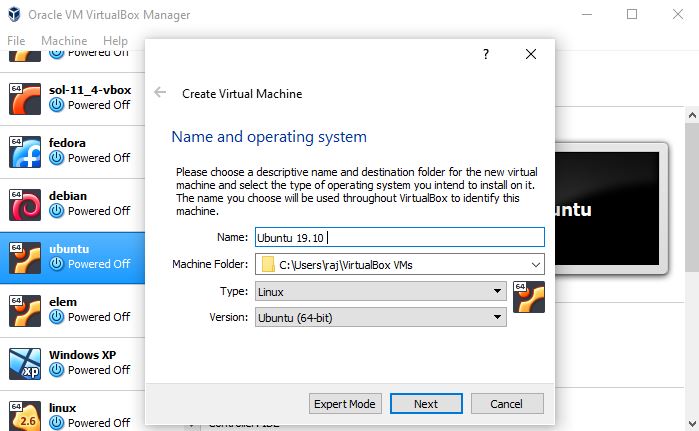
- Type the operating system name Ubuntu 19.10 and rest of settings will set automatically.

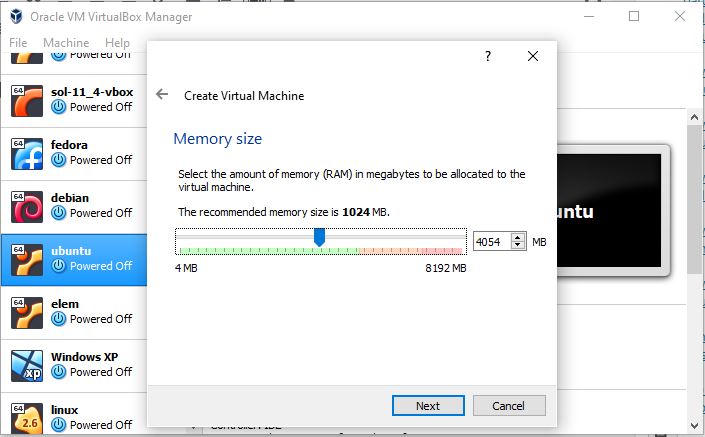
- Set the amount of RAM for you Linux VM, as recommended one i.e 4GB.

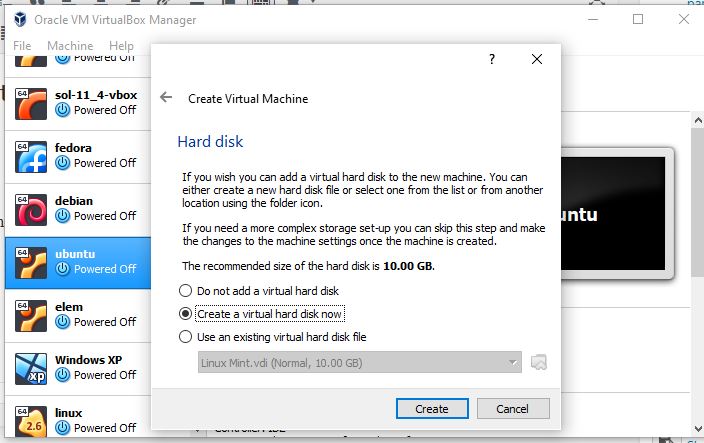
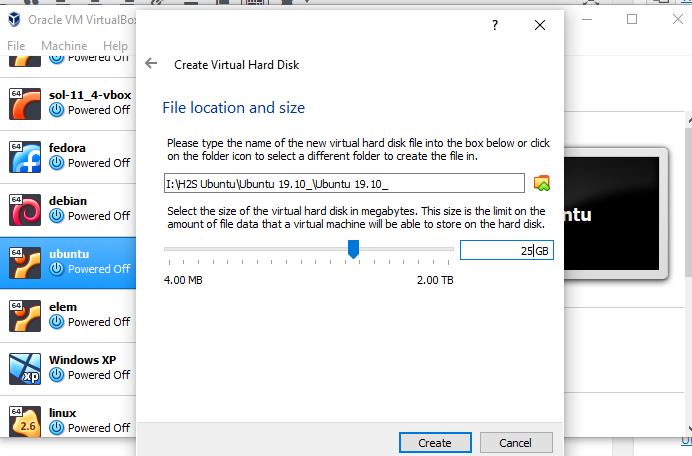
- Now create a virtual hard drive for the same. Leave the default option for the hard disk file type that is VDI and then Dynamic allocated.

- Use the scroll bar and set the disk size to 25 GB or more and then click on the create button.

- Finally, you will find your newly created Ubuntu 19.10 virtual machine on the left side panel of the VirtualBox. Select that and click on the Settings button on the given in the Menu.
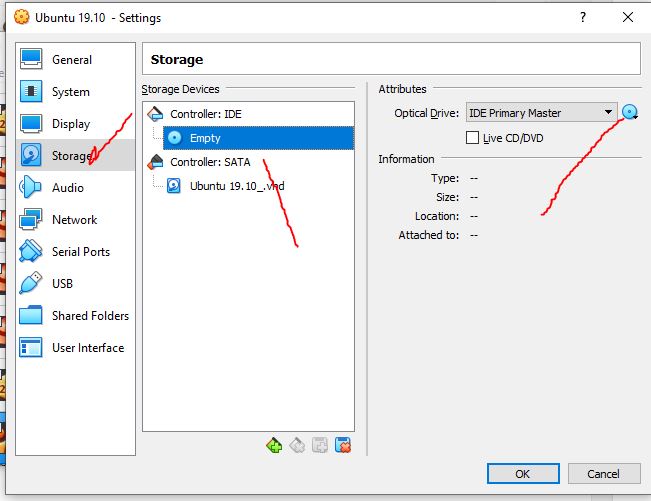
- Click on the Storage and Empty CD drive under the Storage Device.
- Again on the CD icon that has given under the Attributes and selects “Choose Virtual Optical Disk File”.
- Browse to the downloaded Ubuntu 19.10 ISO file and select that. And press the OK button.

- Now click on the Start button given on the VirtualBox top menu.
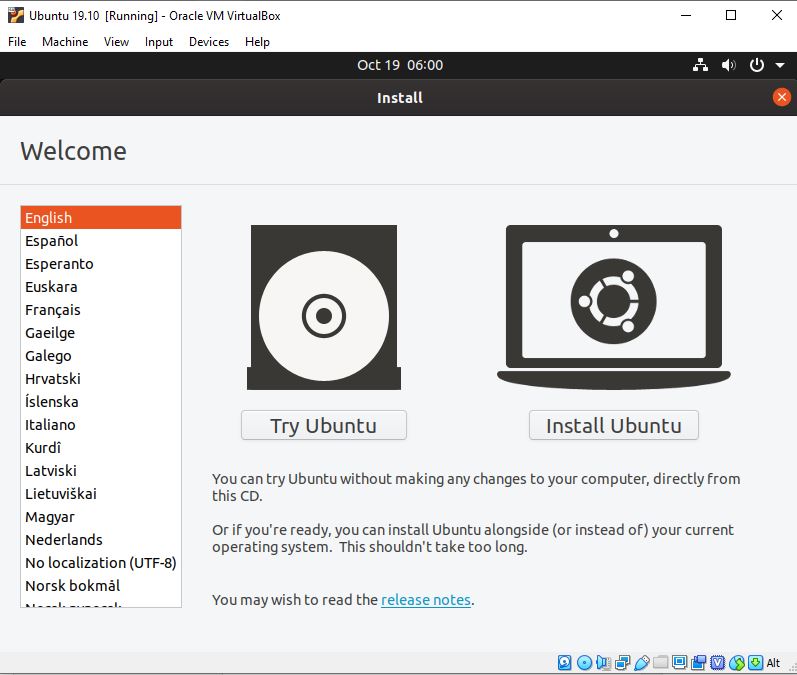
Step 4: Ubuntu 19.10 Boot Menu
If you want to just try Live Ubuntu then select the Try Ubuntu option and for those want to install it can go for Install Ubuntu one. Here were are installing it.
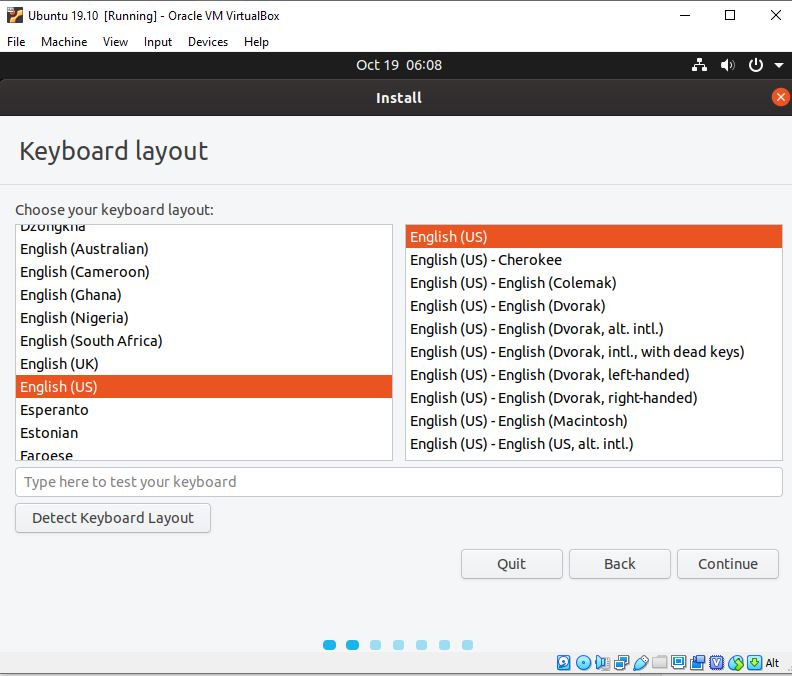
Step 5: Select the Keyboard layout
As per the keyboard you are using, choose the one from the listed options, however, by default, it is set to US English.
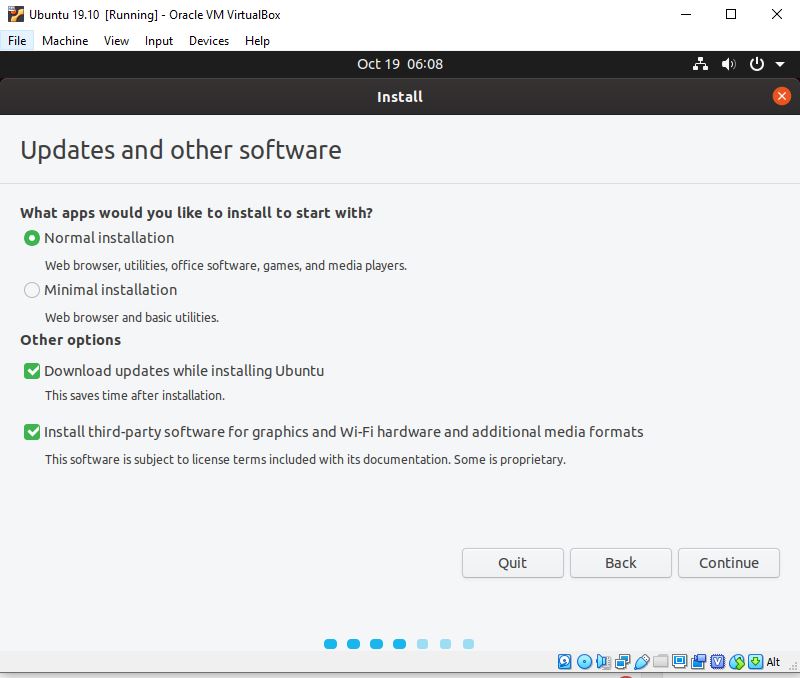
Step 6: Normal or Minimal installation
If you don’t want office software, games, utilities, web browser and media players come as pre-installed on Ubuntu then select the minimal installation and check the other options before clicking on the continue button.
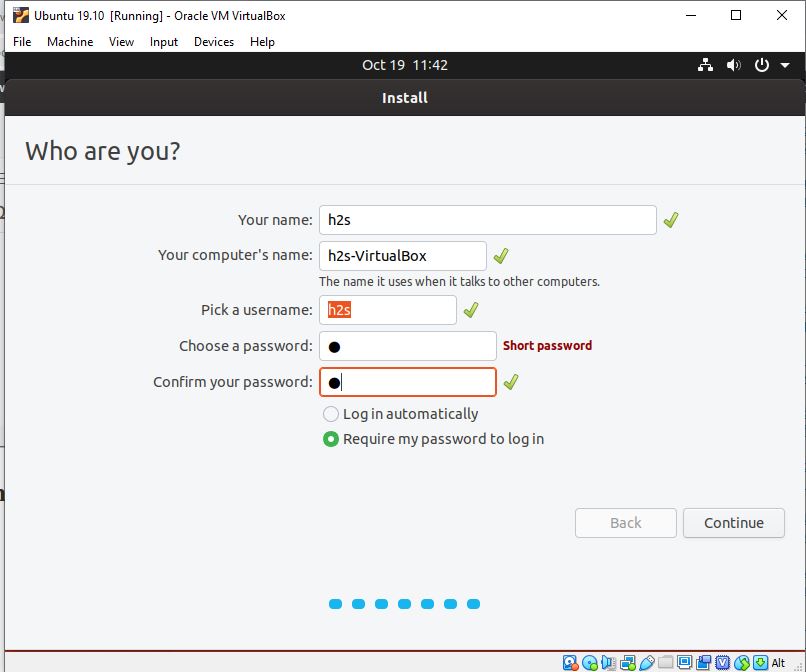
Step 7: Create a Username and password
Simply type the name which you want to set as a username on your newly installed Ubuntu 19.10 along with the password.
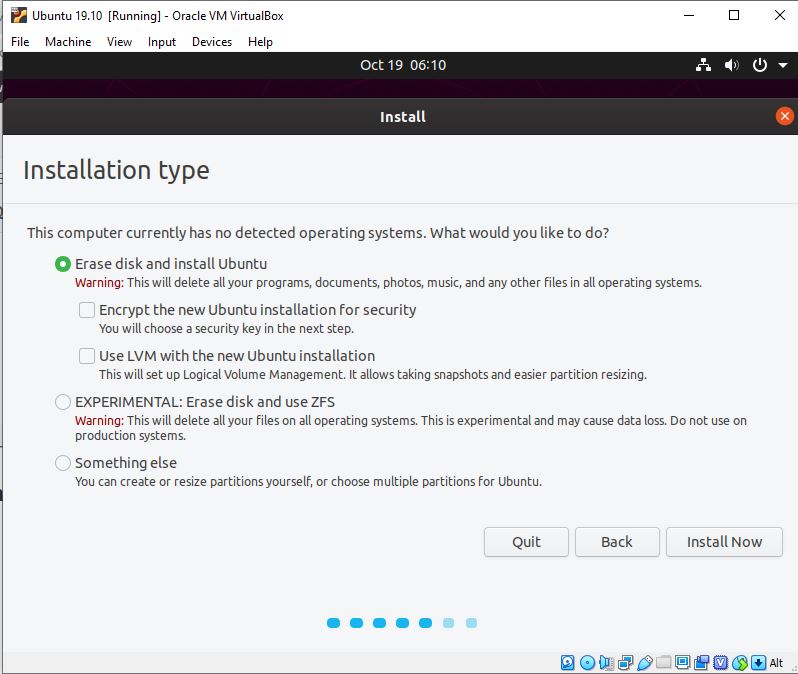
Step 8: Erase disk and install Ubuntu or ZFS
As we know the new Ubuntu 19.10 comes with ZFS file system support, so, if you want to enable the snapshot functionality and want to test it then select the “Experimental: Erase disk and use ZFS” or just leave the default “Erase disk and install Ubuntu” one and click on the Install Now button
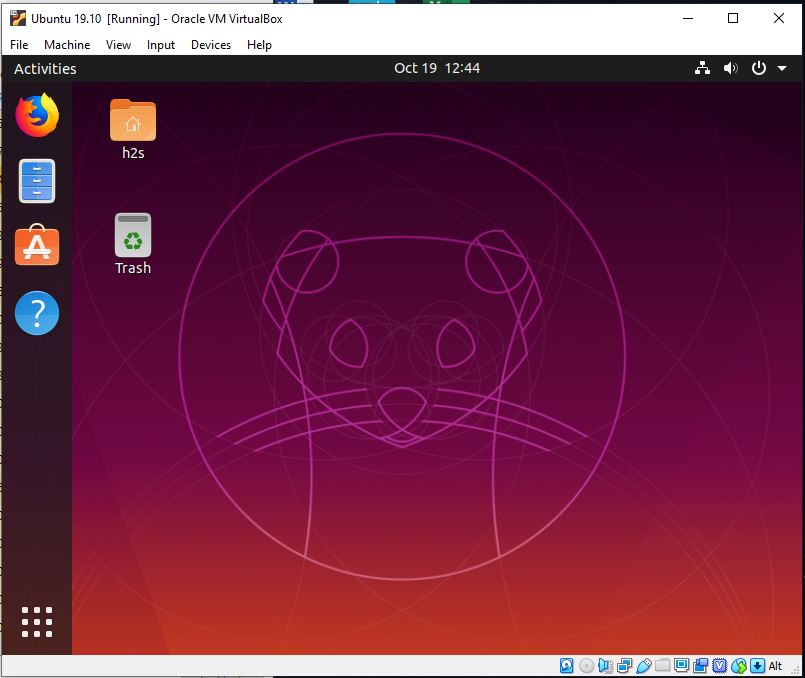
Wait for a few minutes depending upon your system configuration. After the installation gets completed, go to menu given on the top and select Devices->Optical drive and uncheck the inserted Ubuntu 19.10 ISO image. After that restart, VirtualBox Ubuntu virtual machine and you will get the latest version ready to experience.
Related Posts
How to create QR codes on Google Sheets for URLs or any other text elements
How to install Kruti Dev Font in Windows 11
How to Reopen Closed Windows or Tabs in Firefox
How to Install Django on Windows 11 or 10
How to set Gemini by Google as the default Android assistant
How to create data bars in Microsoft Excel for numeric values